This is the very first post on the new blog I call Freckle Faced Fabric Head.
Welcome! I hope this will be a place for all the fellow fabric heads to inspire one another.
This story is for my friends on the Janome Memory Craft 9850 Facebook group. I have enjoyed discovering all the features on this machine with you and figuring it out together.
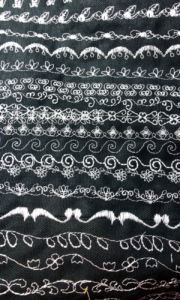
I was inspired by all the samplers I saw folks making to try out their new machine. I decided to do one too.
I’m glad I did because look how much better you can see how beautiful the stitches are on the fabric.


printable instructions
Here are the instruction are the printable instructions if you would like to try it. There is also a brief overview video on Youtube. However, I don’t show me actually making it from start to finish.
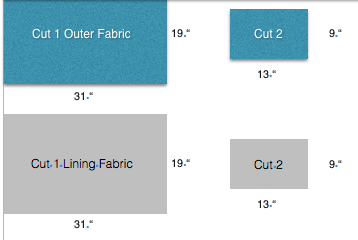
without embroidery unit attached Cutting List
- (1) 31 X 19″ outer fabric
- (1) 31″ x 19″ lining fabric
- (2) 13″ x 9″ outer fabric
- (2) 13″ x 9″ lining fabric

With embroidery unit attached Cutting List
- (1) 33 X 19″ outer fabric
- (1) 33″ x 19″ lining fabric
- (2) 14.5″ x 9″ outer fabric
- (2) 14.5″ x 9″ lining fabric
Method
- Measure and cut the rectangles for the outer and lining pieces of your selected fabrics. I used black cotton duck canvas for the outer fabric.
- Select your thread color. I used white cotton machine quilting thread because a had a lot of it and you will use a ton of thread.
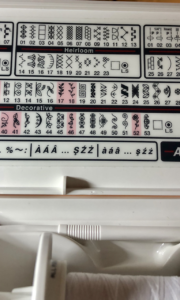
- Select the decorative stitch of your choice. I started with #3 decorative stitch.
- Stitch a reference number before each row. I wish I had drawn some straight lines for reference so I wouldn’t have so many crooked rows.
- After stitching your sampler, you can add embroidery to the lining fabric. I used the built in embroidery design under Monochrome, then push the red arrow button to page forward and select sewing machine design #3 for the RE20a hoop.
- In edit mode, I rotated the design so that it would be stitched horizontal because the direction the fabric was in the hoop.
- I added words using the monogram stitch designs and editing the direction and size. I
Assembly
- With right sides together pin the 13” piece to the bottom of the 31” piece.
- Stitch 1/4 seam and stop 1/4 inch from the end of the 13” piece.
- Pivot at the corner and fold the top piece back on itself and then match up edges of the 9” part of the side to the remaining part of the 31” part. Stitch and stop 1/4 “ from the end of that piece.
- Pivot again and continue to sew the remaining side piece to the top piece.
- Repeat for the same method for the remaining side and for the lining pieces.
- Turn lining inside out, so that right sides of lining and outer cover are together.
- Stitch all the way around leave a 6” opening
- Turn, press and topstitch all around the bottom while closing the 6” opening.

Can’t understand how you put it together please show us how,just couldn’t understand instructions
Can I buy an already made one from you?
Do you want a cover for this particular machine? Email me at shelley@frecklefacedfabrichead.com.